
How To Avoid Being Flagged As a Non Secure Site by Google Chrome

The internet is now a part of our everyday lives and we routinely share sensitive and personal information with the websites we visit. Passwords, email IDs, addresses, phone numbers, credit card details and bank information - everything is shared. How certain are we that this information is kept safe by the receiving websites ?
To be reassured of safety, look for a small green padlock in the address bar of the website. Also, take care that the address starts with 'https' and not 'http'. You can see them in the address bar of this page. These are indicators that the website is using SSL certification and that the connection will be secure.
SSL creates an encrypted connection between your web server and the visitors' web browser which cannot be viewed by third parties. 'https' in the address bar means all communication between your browser and the website are encrypted.
Some HTTP Sites To Be Labelled 'Not Secure' By Chrome Starting January 2017
More than half of Chrome desktop page loads are now served over HTTPS. Encrypting your website may become a necessity faster than you think. Google Chrome has long term plans to mark all HTTP sites as non-secure. And come January, the new version of Chrome (Chrome 56), will take Google one step closer to this goal.
A number of features are already removed in Chrome when accessed over HTTP - geolocation, push notifications, HTTP 2 and getUserMedia(). The websites that will next have to fall in line (by January 2017) are those that ask you to enter a password or credit card information. Else, they risk being labelled as non-secure (shown below). AppCache and Encrypted Media Extensions are in the queue for exclusion.
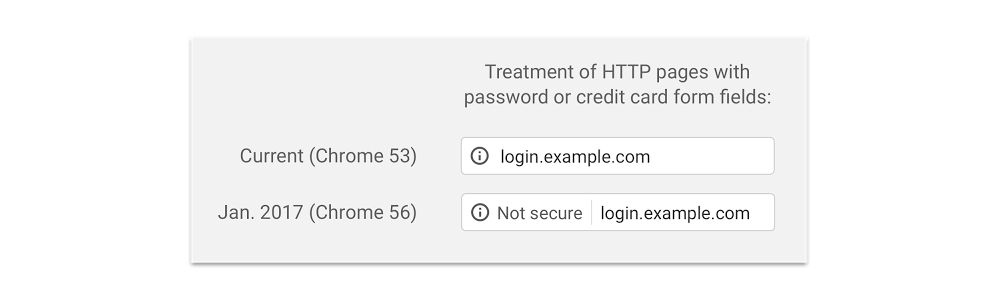
At present, Google carries a neutral indicator for HTTP sites. Eventually, it aims to label all HTTP pages as non-secure, and change the HTTP security indicator to the red triangle that is used for broken HTTPS.

So, if you are dependent on Chrome to bring traffic to your website, you have to seriously consider adding SSL/ HTTPS to it. Otherwise, you will run the risk of being labelled 'non-secure' by Chrome.
As you can guess, eCommerce websites will be affected by this labeling, as they need users to login and submit credit card details. Websites having WooCommerce, a popular eCommerce plugin will similarly be affected. (If you are running a WooCommerce enabled website, and are looking to add functionalities to WooCommerce, our recent post, 7 Handy WooCommerce Plugins To Spruce Up Your Online Store can help you.)
If I've got you all worked up with this info, don't fret too much. Read on and you'll see that HTTPS/ SSL is not really the bugbear that it is made out to be.
What Is SSL / HTTPS ?
SSL is the standard security technology for establishing an encrypted link between a web server and a browser. This link ensures that all data passed between the web server and a browser remains private and integral.
Hyper Text Transfer Protocol (HTTP) is the protocol over which data is sent between your browser and a website. HTTPS is the secure version of HTTP. The 'S' at the end of HTTPS stands for 'Secure'. HTTPS is a way of creating a secure connection for safe data transfer.
Once the connection is established, the server encrypts the data so that only the final recipient can view and decipher it. To any one who listens in on the sly, the data will only be a string of gibberish and make no sense. This makes it difficult for hackers to eavesdrop or inject malware.
Why You Need HTTPS ?
A load of personal and sensitive information like addresses, credit card details and email IDs, is shared on an everyday basis over the internet. When you load a website over HTTP, someone else on the network can look at or modify the site before it gets to the browser. Sensitive information can be stolen and misused.
An insecure connection is also susceptible to injection attacks.
With HTTPS sensitive personal information remains protected. HTTPS assures the user about the identity of the website, confidentiality between the website and the user's browser and the integrity of the data passed between them. A user is able to communicate with the website over a safe and secure connection protocol.
Moreover, encryption reduces the scope for tracking by government or ISPs, minimizes malware injection, makes up atleast partially for inadequate server infrastructure and reduces exposure to hacking.
Steps To Setup and Use SSL with WordPress
1. Obtain a SSL Certificate from a Certifying Authority: There are many companies like Comodo, DigiCert, and SSL.com offering certifying services. You will need to apply for the certificate with website and ownership details.
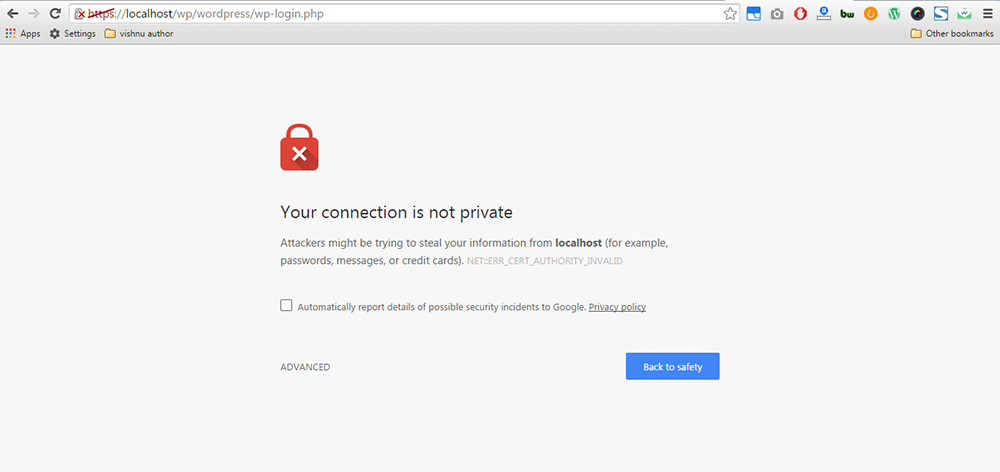
When a visitor lands on a website that is not SSL enabled, this is the screen that will be seen,
Obtaining a SSL certificate need not be a costly affair and may turn out cheaper than you think. Certificates can be acquired easily and at negligible cost from SSLMate and for free from Lets Encrypt. Some hosting service providers offer free SSL with their hosting plans.
You'll receive a public and private key from the issuer. Submit the public key to the Certifying Authority to help in creating the certificate, but the private key isn't for sharing with anyone. The keys are a string of cryptic letters and figures that fit each other like a lock and key. The SSL certificate is then issued, signed by a Secure Hash Algorithm.
2. Backup: An important second step is to back up your website. You are going to mess with the ht.access file and any error can break up your site. So be cautious and backup.
3. Adding SSL to Admin Area and Login Pages: Find the wp-config.php file. Look for the last line that reads,
/* That's all, stop editing! Happy blogging. */
Just above that line, paste this piece of code,
define('FORCE_SSL_ADMIN', true);
This code string makes sure that your login pages and access admin areas are reached only through the SSL mode.
Now that you have added the SSL to your login page, you need to redirect visitors to the secure HTTPS site, instead of the original HTTP site.
To do this, locate the ht.access file and paste the following piece of code,
RewriteEngine On
RewriteCond %{SERVER_PORT} 80
RewriteRule ^(.*)$ https://www.examplewebsite.com/$1 [R,L]
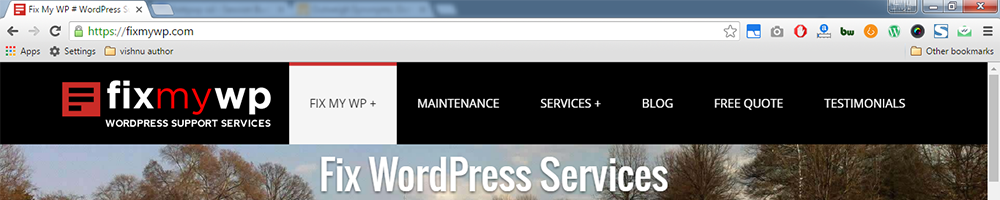
Make sure to replace "www.examplewebsite.com" with your site URL and also make note to key in the correct server port. Once you've done this, visit your website and view the address bar. 'https' should now appear alongside a green padlock. See image below,
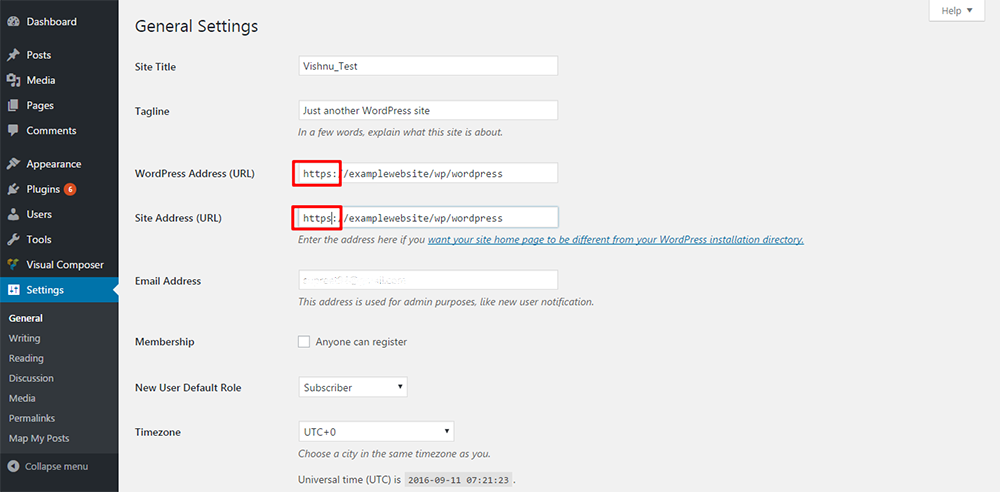
4. Adding SSL site wide: To do this, visit the Settings page in your WordPress Admin General Settings and update the WordPress and site URL.
You can also move your entire website to SSL with the help of a light and competent plugin - Really Simple SSL. This plugin replaces all your 'http' URLs with 'https', except the links to external domains. The changes are dynamic, so the database is left untouched (except for the site URL and domain URL). A single click can enable SSL across the website.
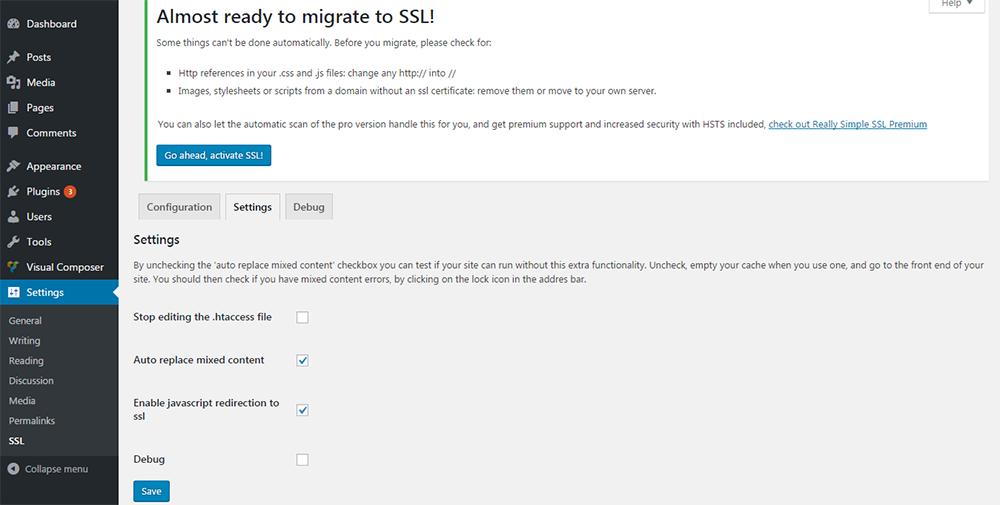
The plugin is mutlisite ready, and can be activated over the entire network or on a per site basis.
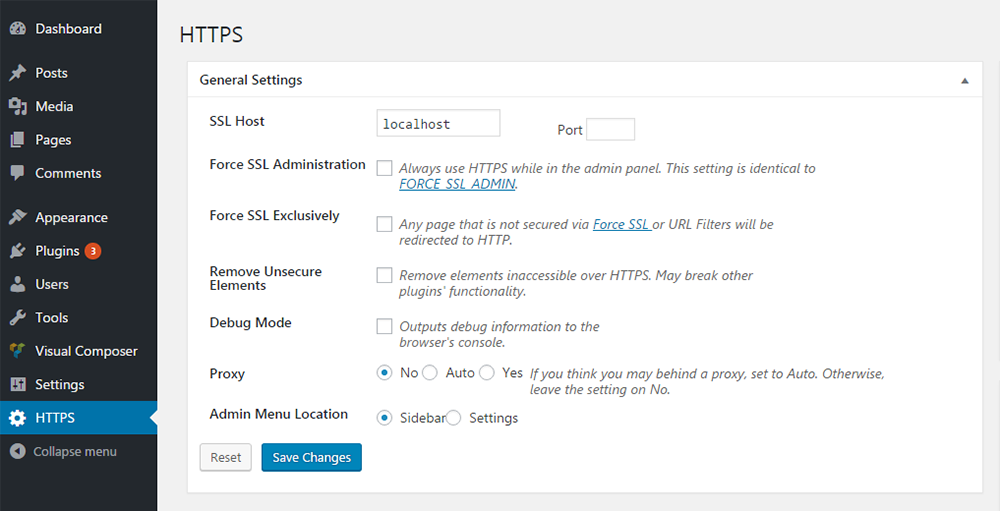
5. Adding SSL only to some pages: This can be done with the help of a plugin WordPress HTTPS (SSL). This plugin hasn't been updated in over three years, but the plugin author has promised to bring out a newer version soon. It enjoys a high number of active installs and a good rating in the WordPress directory.
To add 'https' only to pages and posts that you pick, you should enable the 'Force SSL Exclusively' option in the General Settings page of the plugin.
You can read up more on installing SSL in WordPress Codex.
Concerns about HTTPS
Data has to be encrypted by the server and decrypted at the browser end. This can create latency that can hamper performance. Speed can take a hit and this can affect search engine ranking.
It is true that search ranking is likely to dip a little at the time of transition, but it is equally likely to bounce back to pre transition levels quickly, just as it happens in the case of any transition. Also, the dip in speed maybe offset by the small ranking boost given by Google to HTTPS/ SSL sites. The benefits of moving to HTTPS easily overshadows any temporary dip in speed.
Additionally, there is scope for technical otpimizations, so you don't have to sacrifice speed all that much. You can refer to Google's Guide on how to move a site to HTTPS without slipping in search engine rankings.
Referrer Headers and Ad Revenues are the other two areas of concern while making the move to HTTPS. But with search engines migrating to HTTPS, user agents and advertisers will also be required to move to HTTPS eventually. You can also check out our earlier post on How To Recover The Lost Google Analytics Referral Data to take remedial measures.
Final Thoughts
With HTTPS & SSL becoming inevitable in the long run, it is essential to plan the movement of your website from HTTP to HTTPS before it becomes an emergency. Besides being mandated by Google, HTTPS / SSL is a good security cover for your website and you pretty much owe it to visitors who share sensitive information on your website.
So go ahead, get your SSL certificate, make the transition to HTTPS and reassure users that your website is worthy of their trust.
MaAnna
September 19, 2016 at 8:01 pm
Thanks for this nice write up on converting to HTTPS, Makis. I’ll have to make the switch for my membership sites, as they have a login bar on every page. The payment gateway pages are already secure, so it’s now a matter of converting the rest of the site. Fortunately, that will not be as hard of a problem since the only content other than the text are the video tutorials. So, there’s no worry about mixed media from outside sources.
I’m so glad I put my membership sites on a sub-domain and I’m not forced into the task of having to switch over my main site yet, where there will be a lot of mixed media from multiple sources. But that day is coming!!
Fix My WP
September 20, 2016 at 8:30 pm
Thank you MaAnna 🙂
Amy
September 20, 2016 at 8:27 pm
Excellent write up. Thanks for answering the questions I didn’t know I had yet. Good to know about the Google ranking also. Thanks for all your time and hard work on this!
Fix My WP
September 20, 2016 at 8:30 pm
Thank you!